(continued from Part II)
DotNetNuke (aka DNN) is not simple to set up. It needs at least the free SQL Server Express Edition on the host system (full SQL Server requires some changes to the default configuration) and either IIS or another ASP .NET 2.0 compatible web server to run on. If you have Visual Studio 2005 fully installed, you have all you need to run DNN.
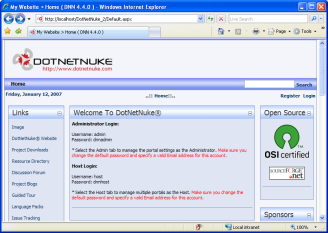
There are a number of manual steps involved, and the steps are different depending on the environment, and whether or not you have the version with full source code included. The quickest route to an operational DNN installation is to download the latest ‘Install’ files from http://www.dotnetnuke.com/ and unzip them to a new folder. Next, make sure the ASPNET account has modify, read, execute, and write access to that folder (new folders will not have this permission by default — it must be added). Next, create a new virtual directory in IIS and map the new virtual directory to the new DNN folder. Once this is done, open a browser and browse to the new virtual directory. This will initiate the DNN installation sequence, where it creates and populates its database with default settings. Once the installation sequence completes, DNN is ready to use, and looks like this:
The structure of DotNetNuke is designed so that a single DNN installation consists of a host (the person controlling the physical computer on which the web site lives) and any number of portals (that may be administered by others). The distinction is important when changing settings because host settings can place limits on portal settings, and portal settings can override host default settings. In my case, I am both host and administrator of the single portal.
A DNN portal is a single web site. A web site consists of web pages (also called “tabs” in DNN lingo), each containing controls that may be added to predefined “panes” on the page. Before you can add new controls to a page, the controls must be defined. You can define controls by importing “modules”. These can be third party modules, or one of the 15 or so standard modules that come with DNN.
To actually modify the web site, you simply log in to the web site as an administrator. As soon as you are logged in as an administrator, the web pages change to reveal administrative controls that you can use to modify the layout or module settings of the current page, like this:
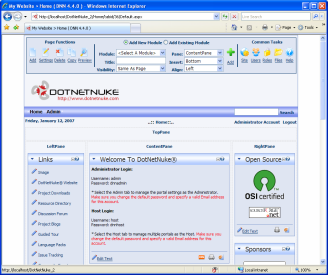
Notice the control panel at the top of the page, as well as the new hyperlinks on the controls themselves. These can be used to change individual module settings, or to move modules around the page (or even to a different page) very quickly and easily. There is also a new “Admin” menu page that an administrator can use to manage all other aspects of the web site such as the skins, user accounts, security roles, and other site settings. In theory, all this editing can be done on a live web site; in practice, most changes should be made first on a local mirror of the site, then uploaded to the server once they have been fully tested.
The beauty of a CMS system is that the software makes it possible to build a complete multi-page web site in minutes. Changing skins is quick and can change the look and feel of an entire web site instantly. Unfortunately, there’s always a catch. The price of quick-and-easy is that you have to live with the quirks, bugs, and inconsistencies that come with the software. I spent a lot of time trying to fix some little things that I wasn’t happy with. In some cases I was able to fix them myself, but in the end I just had to learn to live with numerous small irritants.
Coming up in Part IV, completing my first custom module.
One thought on “I’ll take web sites for $200, Alex: Part III”