I have updated the automatic lisp loader modules (LspLoad.zip on my freebies page) to support Bricscad V14 and ZWCAD+ 2014. Note that the source code for Lspload is also available.
Tag: Bricscad
LspLoad Updated for AutoCAD 2014 and Bricscad 13 64-bit
The automatic lisp loader modules (LspLoad.zip on my freebies page) have been updated to add support for AutoCAD 2014 and Bricscad 13 64-bit. The modules are now digitally signed so that AutoCAD 2014 loads them quietly.
Registering an ARX/BRX module as a COM server
If you’re developing ARX modules that need to be registered as a COM server, you’re faced with some decisions about how to register them. In the old days before anyone cared about user permissions, registration could be safely accomplished at runtime, even via AutoLISP. Unfortunately runtime COM server registration just doesn’t work reliably any more under limited user accounts, not to mention registry redirection on 64-bit platforms. There is only one reliable way to register COM servers, and that’s doing it at install time under elevated privileges.
A normal Windows application might accomplish install-time registration by calling RegSvr32 after the files are copied to the destination folder, but this doesn’t work with ObjectARX or BRX modules. The reason it doesn’t work is because ARX modules cannot be loaded outside the AutoCAD or Bricscad process. RegSvr32 will fail with errors like “The module <filename> failed to load” or the even less helpful “The specified module could not be found.” There are some kludgy ways to get RegSvr32 to work anyway, but the simplest and most reliable way to solve this problem is to forget RegSvr32 and just add the needed registry values manually into your installer script. It’s not difficult, though it might be time consuming initially if your server implements a lot of COM objects.
At a minimum, a COM server must register at least one COM class under HKCRCLSID. If the COM server needs to support OLE Automation (e.g. VBA, AutoLISP) it must register a type library in HKCRTypeLib. In most cases, this is all that is needed, however you may also need to register a “ProgID” in HKCR if a script or in-process module needs to be able to connect to the server via human-readable ProgID.
Most installation script software can import Windows registry script (.reg) files, so it’s often helpful (and more maintainable) to create a registry script file manually, then simply import the .reg file into the installation script. If you use Visual Studio deployment projects, this is the only way to batch import registry values into the installation script. I’ve provided a minimal template for a registry script that registers a single COM object and ProgID. The template uses special characters as placeholders for the actual values: $$ is the human readable ProgID name, ## is the COM object’s CLSID, ** is the filename of your ARX module, and %% is the type library GUID. The type library and object class version numbers should match your actual version numbers as well, and of course [TARGETDIR] is the installation target directory that will be resolved at install time.
Windows Registry Editor Version 5.00
[HKEY_CLASSES_ROOT$$.1]
@=”$$ Class”[HKEY_CLASSES_ROOT$$.1CLSID]
@=”{##}”[HKEY_CLASSES_ROOTCLSID{##}]
@=”$$ Class”[HKEY_CLASSES_ROOTCLSID{##}InprocServer32]
@=”[TARGETDIR]**.arx”
“ThreadingModel”=”Apartment”[HKEY_CLASSES_ROOTCLSID{##}ProgID]
@=”$$.1″[HKEY_CLASSES_ROOTCLSID{##}Programmable]
[HKEY_CLASSES_ROOTCLSID{##}TypeLib]
@=”{%%}”[HKEY_CLASSES_ROOTCLSID{##}VersionIndependentProgID]
@=”$$”[HKEY_CLASSES_ROOTTypeLib{%%}]
[HKEY_CLASSES_ROOTTypeLib{%%}1.0]
@=”$$ 1.0 Type Library”[HKEY_CLASSES_ROOTTypeLib{%%}1.0�]
[HKEY_CLASSES_ROOTTypeLib{%%}1.0�win32]
@=”[TARGETDIR]**.arx”[HKEY_CLASSES_ROOTTypeLib{%%}1.0FLAGS]
@=”0″[HKEY_CLASSES_ROOTTypeLib{%%}1.0HELPDIR]
@=”[TARGETDIR]”
It’s really not that complicated for a single module. The work can be tedious to create all the values for multiple modules in scenarios where you support multiple AutoCAD and/or Bricscad versions or platforms, but these values typically don’t change over the life of the project, so it only needs to be done once. Once you have created the registry values manually, disable all other forms of COM server registration such as wizard-generated runtime registration or automatic “self-registration” at install time. A bonus side effect of the manual registration approach is that a normal uninstall reliably removes all traces of the COM server registration.
OpenDCL 6
You may not have noticed, but AutoLISP is still alive and kicking. This is evidenced by the growing community of developers and hobbyist programmers using the latest release of OpenDCL, the free graphical user interface library for AutoLISP applications. If you’re not familiar with OpenDCL, check out the newly released OpenDCL 6.
BRX on Linux: Getting Started
When I heard that Bricsys had shipped Bricscad for Linux, I was anxious to get to work on supporting the Linux platform. The first order of business was getting familiar with Linux. For that, I chose Ubuntu 10.10 32-bit running on a VMWare Workstation 7.1 virtual machine hosted on my Windows 7 64-bit workstation.
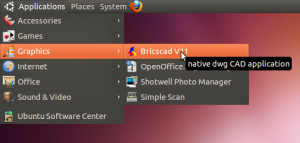
Installing Ubuntu was straightforward, and I had no problems. Installing Bricscad went off without a hitch. I downloaded the Debian package of Bricscad v11 Pro and Ubuntu’s Software Center installed it much like Windows Installer would install an MSI file on Windows.

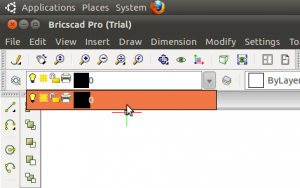
After installation, Bricscad fired right up. Except for a mysterious black splotch in the layer dropdown, it looked and felt very much like Bricscad on Windows.

The next order of business was to build and load a BRX module. I started by installing Code::Blocks, an open source cross platform C/C++ IDE that can be used in both Windows and Linux. The IDE installed fine, but then things got interesting.
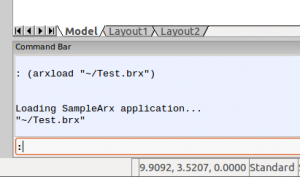
First of all, I found that I had to install the build tools (namely the g++ compiler), because they are not included with the IDE. Eventually I had to set an environment variable for my BRX project pointing it to the BRX SDK, which required a Code::Blocks plugin that had to be installed separately. I did get everything working, and built a simple BRX module without error — but then it refused to load in Bricscad.
Now, one of the things about Linux that is very different to Windows is the culture of users. Googling for help on something invariably leads to instructions that start out “It’s extremely easy to do this on Linux” and end with 4 pages of command line gibberish, including a list of all the stuff that must first be installed for these instructions to work correctly, and the inevitable warning that the instructions may only work on certain “distros” and versions of Linux.
I learned this first hand when I set out to determine why my .brx module was failing to load. I eventually learned that I had to manually add the BRX SDK library path to Bricscad so it could find the needed libraries at runtime. That was the easy part. To make a long (and rather harrowing) story short, I eventually determined that I was missing a single required library (the libgl graphics library). Installing the library in Ubuntu got things working.

Next up: figuring out how to build a Linux BRX module in Windows using the Visual Studio 2010 IDE. That should prove to be very interesting indeed.